Flexible 2nd-Grid for XL Big Green EGG, CGS
Sale price$129.99Regular price
$139.99
Add: a Heat Deflector
Add: Game Changing Setup Accessories
Availability varies by item
— In stock items are estimated to ship tomorrow if ordered now.
We're based near Dallas, so most orders arrive in 2–4 days.
Local to DFW? You can also shop in person or pick up at our Denton retail store — get directions →
Local to DFW? You can also shop in person or pick up at our Denton retail store — get directions →
Flexible 2nd-Grid for XL Big Green EGG, CGS
Sale price$129.99Regular price
$139.99
For 20 years, we’ve helped grillers get the most out of their ceramic grills with racks and accessories that fit right and built to last. Whether you're a seasoned pro or just getting started — if you have questions about fit, features, or what you really need, we're here to help
-
Have a Question? Give us a call
Whether you have questions about fit, compatibility, or just want a recommendation, we’re here to help - and yes, you’ll talk to a real person who knows a thing or two about kamado grills.
📞 Call us at 940-387-0100, or 📬 send us a message.
-
Fast, Reliable Shipping
Most orders ship out same or next business day. And, shipping’s on us for orders over $99.
Live in the DFW metroplex? Swing by and pick it up in-store — we’ll have it ready. Our retail store is located in Denton.
📌 Get directions -
Tips & Resources
New to kamado cooking or just looking to up your BBQ game? Our guides, gear breakdowns, and how-tos will help you get the most out of your setup.
Check out the Pitmaster's Playbook
PRODUCT DETAILS
Description
Add a second cooking level to your XL EGG — and enjoy more flexibility on the CGS XL Woo than the Big Green EGG EGGspander system.
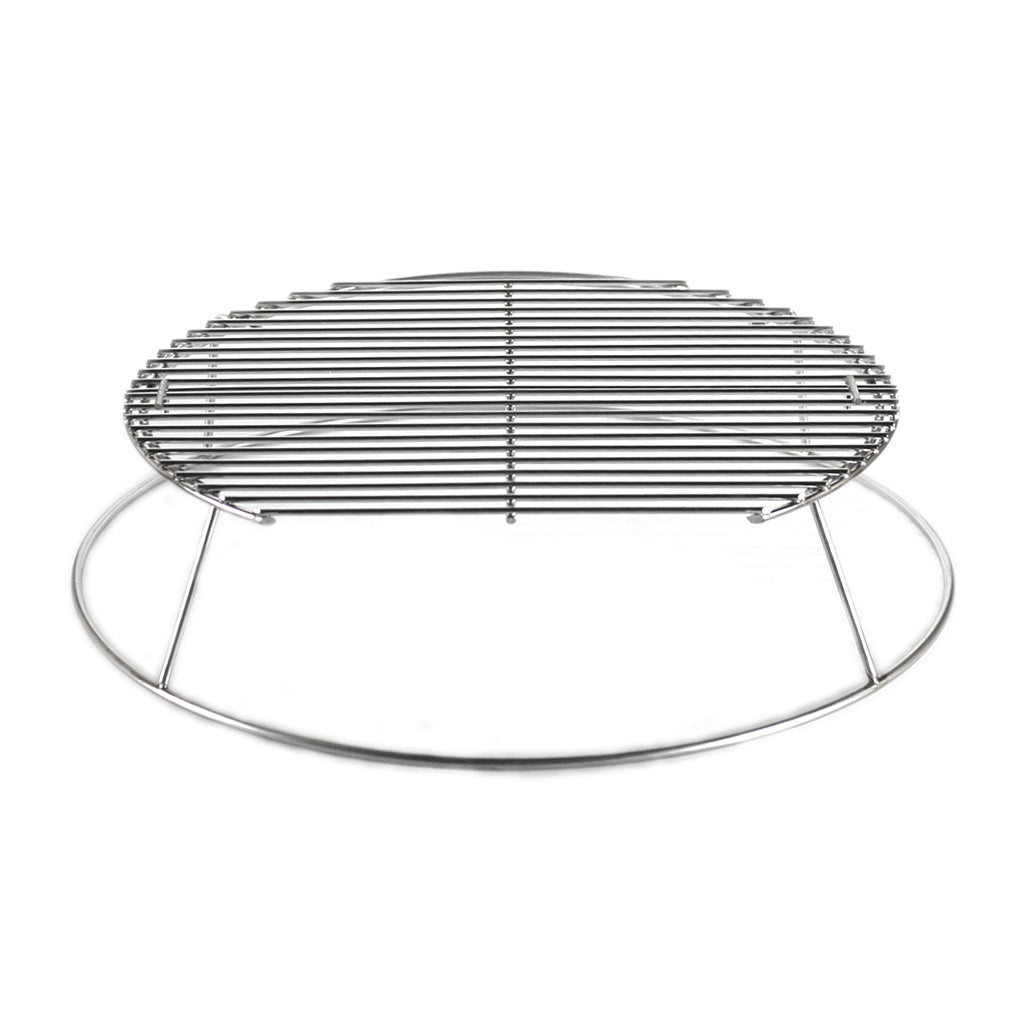
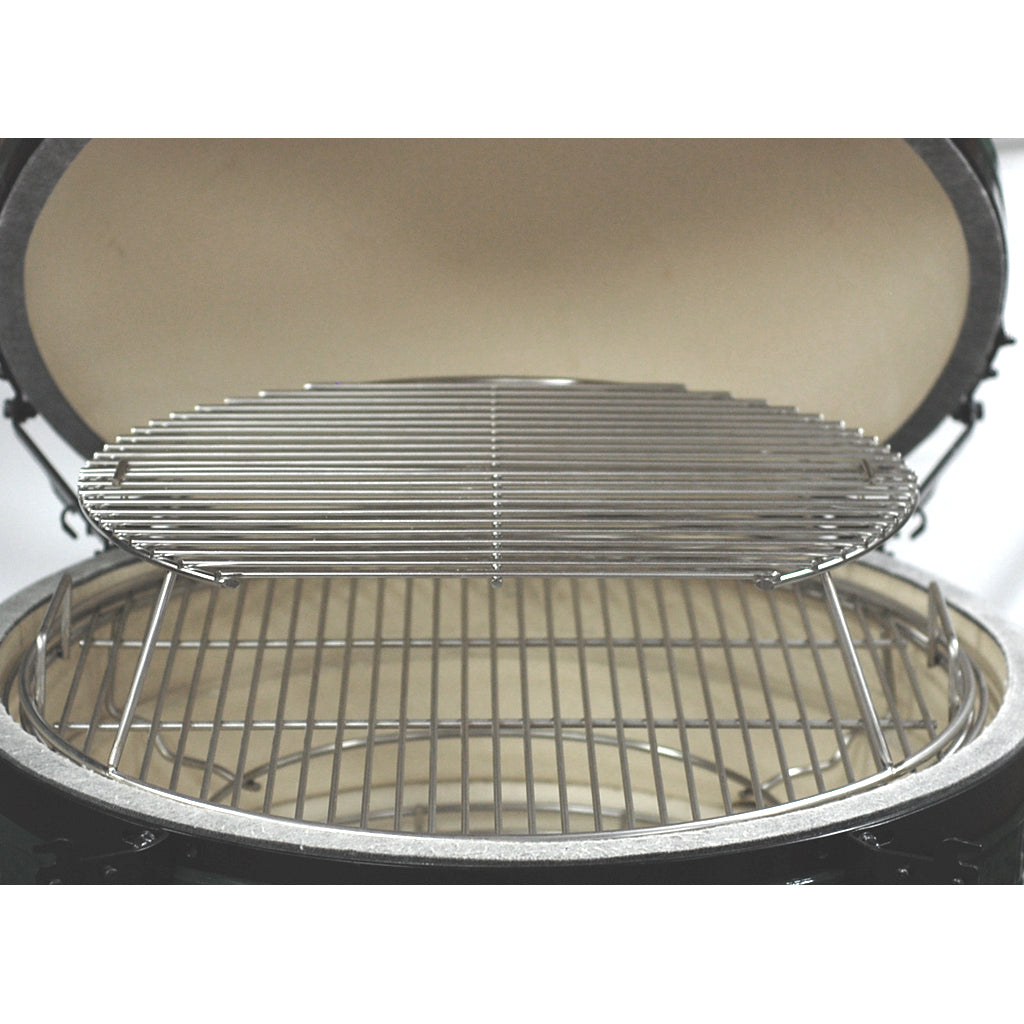
Unlock true multi-level cooking on your XL Big Green EGG. The CGS Flexible 2nd-Grid is an innovative, two-part system built for expanded capability and precise temperature control — perfect for mastering the reverse sear or maximizing indirect and direct zones.
Key Features & Setup Versatility
The Flexible 2nd-Grid can be positioned several ways, giving you multiple ways to move up and down in the XL EGG:
- On Top of the XL Woo: Gain additional height and separation between grids — ideal for multi-level cooks, high in-the-dome grilling, or pizza. (Best & Recommended - Handles on XL Woo)
- Directly on the Fire Ring: Use it alone or with the XL cooking grid underneath. The Flexible 2nd-Grid sits about 5 inches above the fire ring for excellent access and airflow.
- On Top of the XL convEGGtor (with XL grid): Add a second cooking level above the XL grid for large indirect cooks.
 |
 |
 |
 |
Important: The Flexible 2nd-Grid does not fit the Big Green EGG XL EGGspander system.
Innovative Two-Part Grid Design
- Rear Grid: Fixed 20″ half-moon welded to the frame.
- Front Grid: Removable 16″ × 20″ oval half-grid.
 |
 |
Use both grids for a full 20″ round setup on big cooks, or just the rear half for smaller meals or when you need a holding zone.
Create Effortless Two-Zone Cooking
Go indirect up top by placing an 18″ half-moon deflector directly under the rear 20″ half grid.
This “up & back” indirect method delivers three major advantages:
- Up: Moves the indirect zone into the dome for more stable temperatures — perfect for roasting veggies or step one of a reverse sear.
- Back: Keeps the indirect side out of your main grilling area, avoiding a divided grid.
- Up & Back: Opens the entire lower grid for full-area searing and grilling.
Flexible 2nd-Grid Deflector Bracket
To complete the indirect setup, you need the Deflector Bracket. It holds the half-moon deflector right under the 20″ half grid.
 |
 |
The hanger installs easily — just slide it under the half grid and hook the legs onto the frame.
Perfect Reverse Sear Setup
Our go-to configuration with the XL Woo underneath delivers stable roasting temperatures up top and a wide-open sear zone below.

|
 |
We prefer the Large 18″ cast iron grid on the Woo’s lower ring — it offers nearly the same cooking area as two XL half-moon grids on the fire ring at roughly half the cost.
Components: XL Flexible Grid, XL Woo w/ Handles, 18″ half-moon deflector, Flexible 2nd-Grid Deflector Bracket, Large 18″ cast iron grid.
We prefer the Large 18″ cast iron grid on the Woo’s lower ring — it offers nearly the same cooking area as two XL half-moon grids on the fire ring at roughly half the cost.
Easy Setup for Pizza
Use a pair of 18″ deflectors on the Flexible 2nd-Grid to raise your pizza stone into the dome. Add the XL Woo with Handles underneath to push the stone higher for better temperature control. If needed, add the blocking stone on the Woo.

Enjoy Access to the Fire
Set the Flexible 2nd-Grid directly on the fire ring for a raised-direct cook. You’ll get excellent airflow and easy access to the fire for adding smoking wood mid-cook.

XL Adjustable Rig Comparison
The XL Adjustable Rig is the full multi-level solution. It can do everything the Flexible 2nd-Grid does — and much more. At 6″ tall, the Rig is one inch taller than the Flexible Grid.
Which to Pick: If you need ultimate capability, choose the XL Adjustable Rig. If you simply need a second level with added indirect flexibility, the Flexible 2nd-Grid is your match.
FAQs
Swipe to view more FAQs →